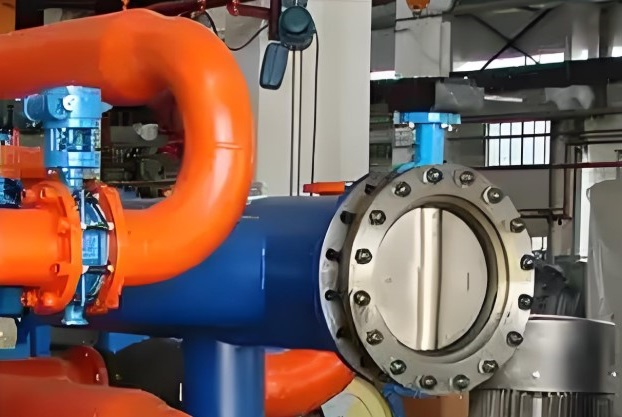
Butterfly Valve Life Cycle Management Guide: Avoiding 90% of Early Failures
I. Butterfly valve installation and use
1、The key check before installation
Alignment calibration: confirm that the valve model, nominal pressure, specifications in line with the requirements, remove the valve cavity and sealing surface of the dust debris, to ensure that the pipeline flange and the valve body concentricity deviation <1mm, to avoid the sealing surface bias abrasion;
Flow direction marking: confirm that the valve body arrow is consistent with the medium flow direction;
Drive matching: manual, electric or pneumatic actuator torque needs to be consistent with the valve caliber pressure level.
2、Installation specifications
Clamped butterfly valve: need to use double-headed bolts to clamp the valve between the two flanges to ensure uniform force;
Flanged butterfly valve: the flange surface needs to be aligned, and the bolts are tightened diagonally to avoid unilateral stress leading to leakage;
Installation direction: horizontal installation is recommended, and the valve stem needs to face upward when installed vertically; inverted installation is prohibited;
Reserve space: sufficient maintenance space should be left around the operating handle or actuator.
3、Operation Precautions
Slow operation is required when opening and closing to avoid instantaneous impact damage to the sealing surface;
Manual butterfly valve switch in place, prohibit additional torque.
Pneumatic or electric butterfly valves need to regularly check the signal feedback and actuator sensitivity. The opening degree is recommended to be controlled at 10%-85% to avoid long-term micro-opening leading to cavitation damage.
4、Operation Taboo
Prohibit the butterfly valve as a throttle valve long-term half-open use;
Avoid overpressure operation.
Particle-containing media need to be installed filters to prevent the valve plate scratching the seal.
It is strictly prohibited to disassemble the factory pre-calibrated transmission device limit. If disassembled need to recalibrate the opening and closing position, otherwise affect the sealing and life.

II. Butterfly valve maintenance and maintenance
1、Daily maintenance
Appearance cleaning: regularly remove the valve surface dirt to prevent corrosion.
Lubrication management: valve stem and transmission parts every 3-6 months refill high temperature lithium grease, remove the old grease residue.
Seal check: Observe whether the valve seat seal ring is aging and cracking, and replace it in time.
Bolt preload: Use torque wrench to calibrate flange bolts.
2、Periodic maintenance (recommended at least once a year)
Disintegration inspection: Clean the impurities in the valve cavity and check the wear of butterfly plate and sealing ring;
Valve stem maintenance: check whether the valve stem is bent or rusted, polish or replace if necessary;
Driving device: pneumatic actuators need to be drained to prevent freezing, electric actuators to check the insulation of the circuit.
3、Deep maintenance (every 2 years)
Disassembly and cleaning: clean the internal scale of the valve body, check the deformation of the valve plate (allowable value <0.1mm/m);
Seal replacement: after disassembling the old sealing ring, the new ring needs to be evenly pressed into the valve groove to avoid distortion; prioritize the use of (EPDM) / fluorine rubber (FKM) and other media-resistant materials;
Anti-corrosion treatment: spray epoxy resin coating (for seawater/acidic environment).
4、Professional maintenance
Seal ring replacement: after disassembling the old seal ring, the new ring needs to be pressed evenly into the valve groove to avoid distortion;
Jamming treatment: if the valve is jammed, brute force operation is prohibited, and it needs to be disassembled to remove foreign objects or grind the sealing surface;
Pressure test: 1.5 times the nominal pressure of the sealing test needs to be carried out after maintenance.
5、Enhanced maintenance in special environments
Dusty environment: install dust cover and blow the valve stem part every week.
Seawater media: valve body with epoxy coating + cathodic protection, quarterly inspection of corrosion.
High temperature steam: select graphite seal + metal valve seat, monitor seal leakage every month.

III. Common Failures and Rapid Treatment Programs
Valve internal leakage: possible sealing surface scratches > 0.1mm, it is recommended to use in-situ grinding tools to repair or replace the seal.
Handle operation jamming: valve shaft corrosion or ash accumulation, inject PTFE dry film lubricant.
Electric actuator overload: torque setting error >10%, need to recalibrate the intelligent torque controller.
Valve body leakage: may be flange bolts loose, according to the diagonal order of hot tightening bolts.
Abnormal vibration: the flow rate in the valve body is too high or the installation is not centered, need to add pipe supports or adjust the flow rate.

 Tel:+86-23-67956606
 Email:
