 Tel:+86-23-67956606
 Email:

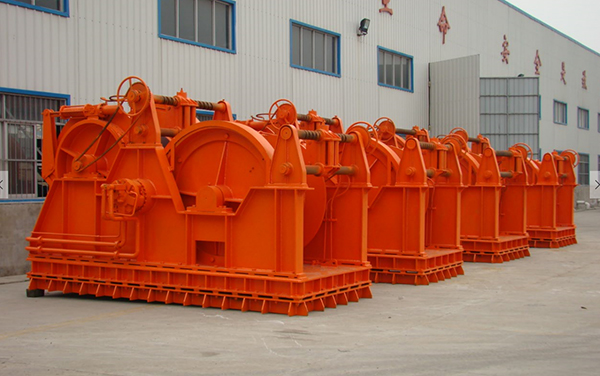
Installation Reference of Marine Hydraulic Winch
Installation Reference of Marine Hydraulic Winch
Installation Precautions
Before assembly, you must be familiar with the structure of each part of the winch to prevent wrong installation and missing installation. When assembling, pay attention to the following matters: all parts need to be cleaned, and iron filings and other stolen goods should not be brought in. During the assembly process, lubricating oil should be applied to all running parts and rolling bearings at any time.
Installation Conditions
1. The winch should be a qualified product that has been checked and put into storage by the quality inspection department of the factory.
2. Before the winch is loaded into the ship, there should be random materials such as the manufacturer's factory certificate, ship inspection certificate and operation manual.
3. Under normal circumstances, the hull in the winch installation area should be installed after the welding and calibration work is completed.
4. The installation drawing of the winch and the drawing of the winch base.
5. Principles, techniques and requirements for the installation of marine auxiliary machinery.
Installation Process
1. The positioning of the base of the marine hydraulic winch from the centerline of the ship, the frame number position and the height from the midline of the deck must meet the requirements of the base drawing.
2. The installation and inspection of the base of the marine hydraulic winch is qualified.
3. When using a steel backing plate, the plane of the base fixing backing plate should be processed first, the flatness is ≤2mm, the surface roughness is Ra3.2, and the outward slope is 1:100.
4. After installing the marine hydraulic winch, use the hanging wire method or the laser method to confirm the horizontal axis of the marine hydraulic winch drum, the tolerance is 3mm/m, the height and the distance from the midship position are ±5mm, and the inspection is qualified.
5. Whisk with steel backing plate.
5.1 Measure the distance between the flat surface of the base fixing pad at each screw hole and the fixing pad at the bottom of the common base. The adjustment pads at each point were prepared respectively, and the surface roughness was Ra3.2.
a) No less than 2~3 contact points per 25mm×25mm of contact surface;
b) Use a 0.10 feeler gauge to partially insert the depth of not more than 10mm;
c) Check the contact ratio between gaskets by colouring method ≥ 50%;
d) The thickness of the steel backing plate shall not be less than 12mm;
e) The thickness of the cast iron backing plate shall not be less than 18mm.
5.2 After the backing plate is qualified for inspection, spot welding the adjustment backing plate and the base fixing backing plate at the part that needs to be reamed, and drills holes according to the position of the anchor bolts of the common base of the winch, leaving a reaming allowance of 2mm.
5.3 The winch, adjusting pad, and hull base are equipped with reaming holes.
5.4 Prepare reaming bolts. Double nuts are used to fasten and prevent loosening. Leave a margin of 5mm~10mm for the length of the bolt.
5.5 Prepare the stop wedge pad according to the requirements of the drawings, and the surface roughness of its mating surface is Ra3.2.
a) Its contact surface is not less than 3 points per 25mmX25mm;
b) Use a 0.05 feeler gauge to partially insert the depth of not more than 10mm;
c) Check the wedge-shaped gasket contact ratio ≥ 60 ~ 70% by coloring method;
d) The contact slope between the wedge-shaped gaskets is 1:50;
e) After the adjustment is completed, the wedge-shaped gaskets are fixed by spot welding.
6. Epoxy resin casting pad.
a) The common base plane of the winch and the base panel casting backing plate is cleaned with volatile organic solvents such as carbon tetrachloride, and there should be no grease, oil, rust and peeling paint on the contact surface of the backing plate;
b) When the epoxy resin pouring backing plate is poured, the screw holes of the winch and the base backing plate are inserted through the wooden plug (or foam pipe strip), and a layer of release agent is applied around the winch, the base backing plate hole and the wooden plug. , easy to pull out the cork;
c) Under the guidance of professional service personnel, carry out the backing plate and sample pouring;
d) After the casting is completed and the backing plate is cured, the hardness of the test plate is measured, and the hardness should be greater than 35 Barcol hardness;
e) Tighten the tightening bolts according to the calculated tightening torque, and the compression of the backing plate should be less than 1/1000 of the thickness of the backing plate.
7. Prepare copper gaskets. Before the winch fixing bolts are tightened, check that the gap between the winch base and the base fixing pad is less than 0.5mm, and no gaskets are allowed; when it is greater than 0.5mm, it is allowed to have no more than 3 thin copper gaskets, and it is not allowed Use a half sheet of spacers.